
Step 1: Login to Laman
First, open laman.click and login with your Google or X (Twitter) account.
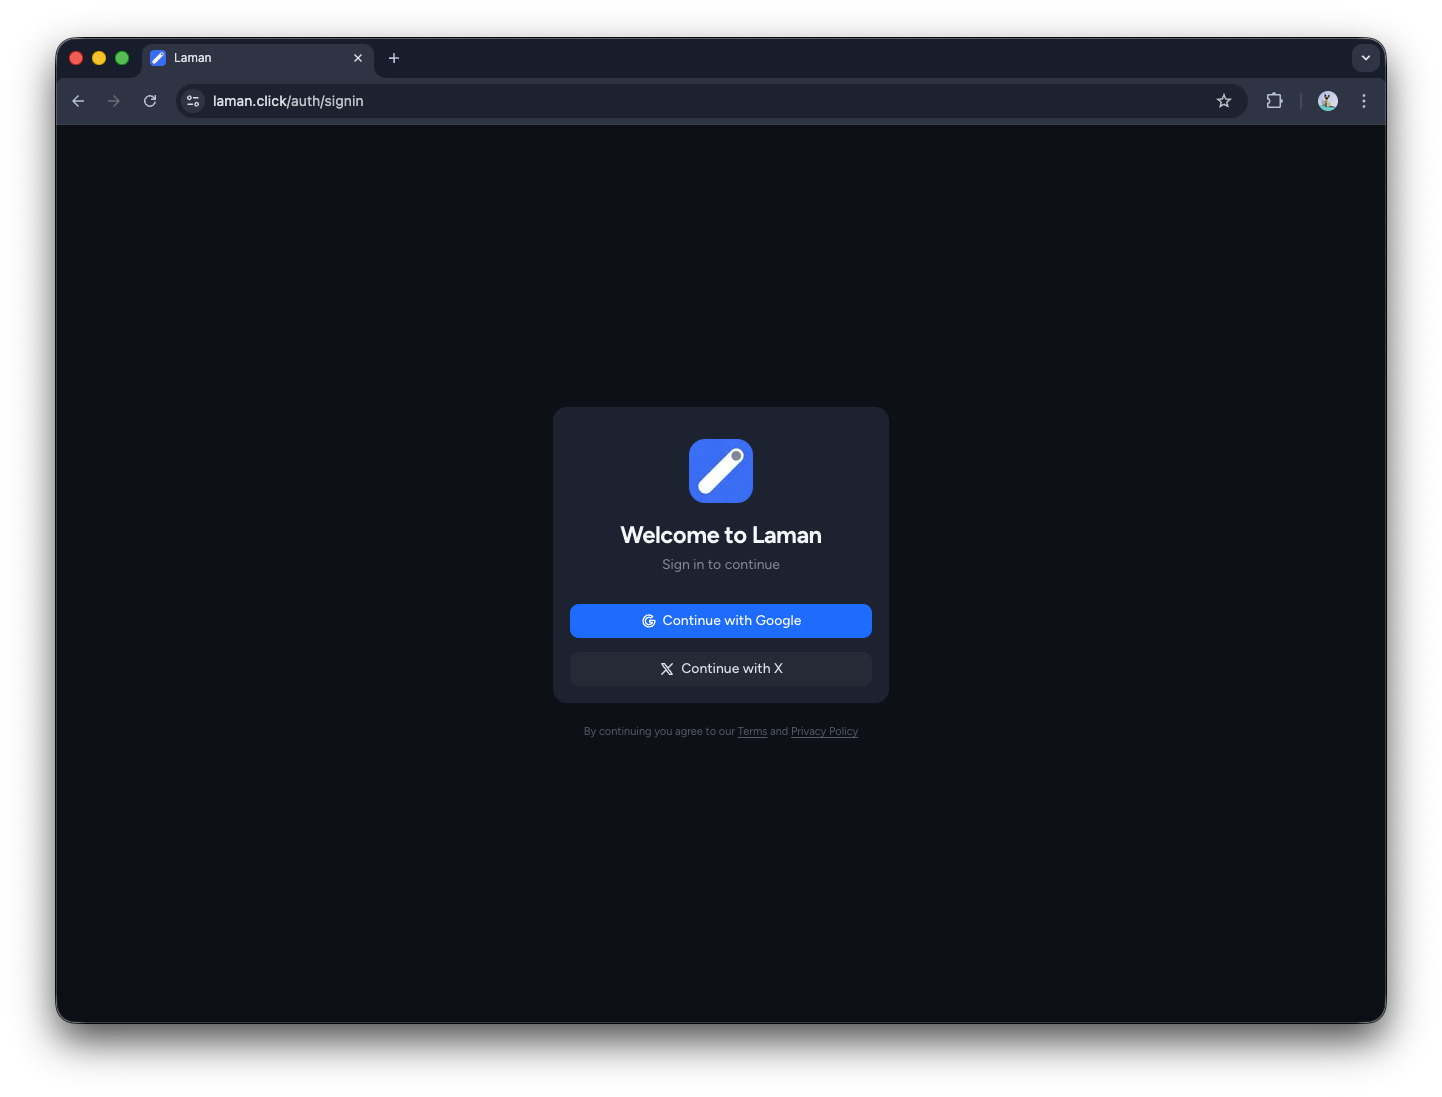
After logging in, you'll enter the project dashboard.
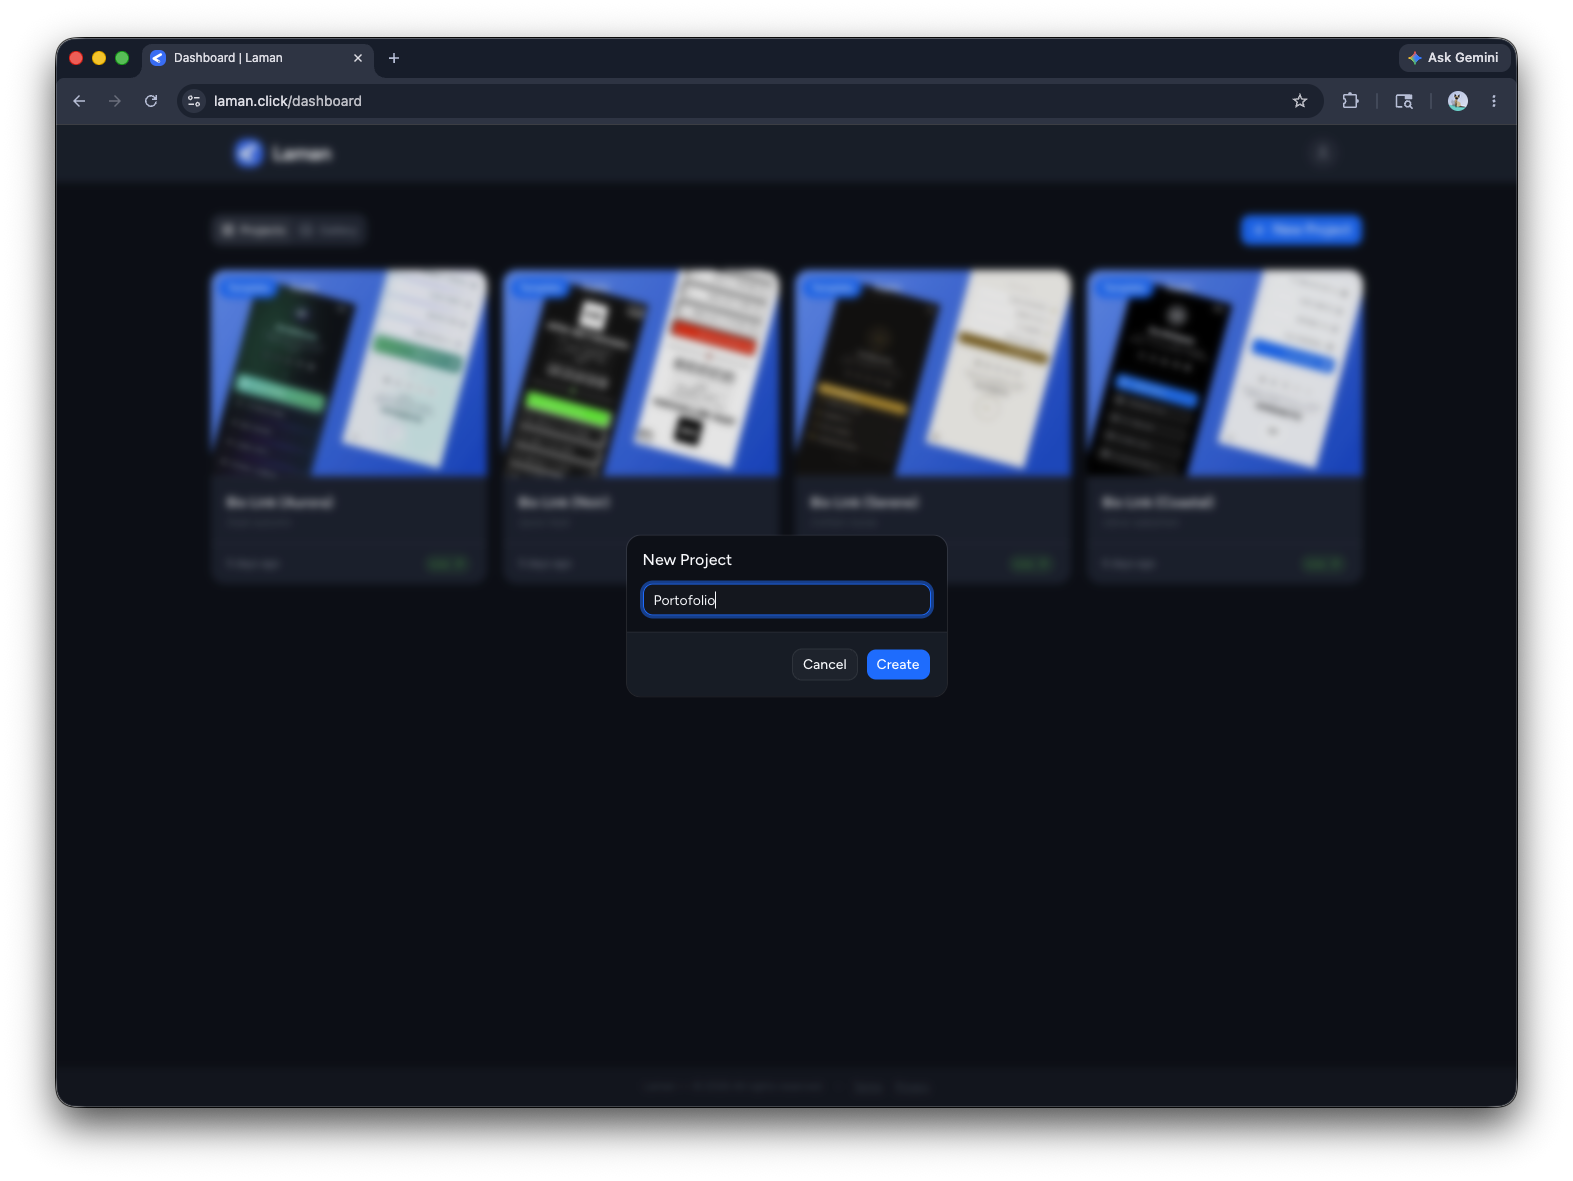
Step 2: Create a New Project
Click the "New Project" button to create a new project. Give your project a name, for example: "Portfolio" or "Landing Page".
Step 3: Project Editor
Now you're in the Editor. You'll see 4 separate panels: HTML, CSS, JavaScript, and Data.
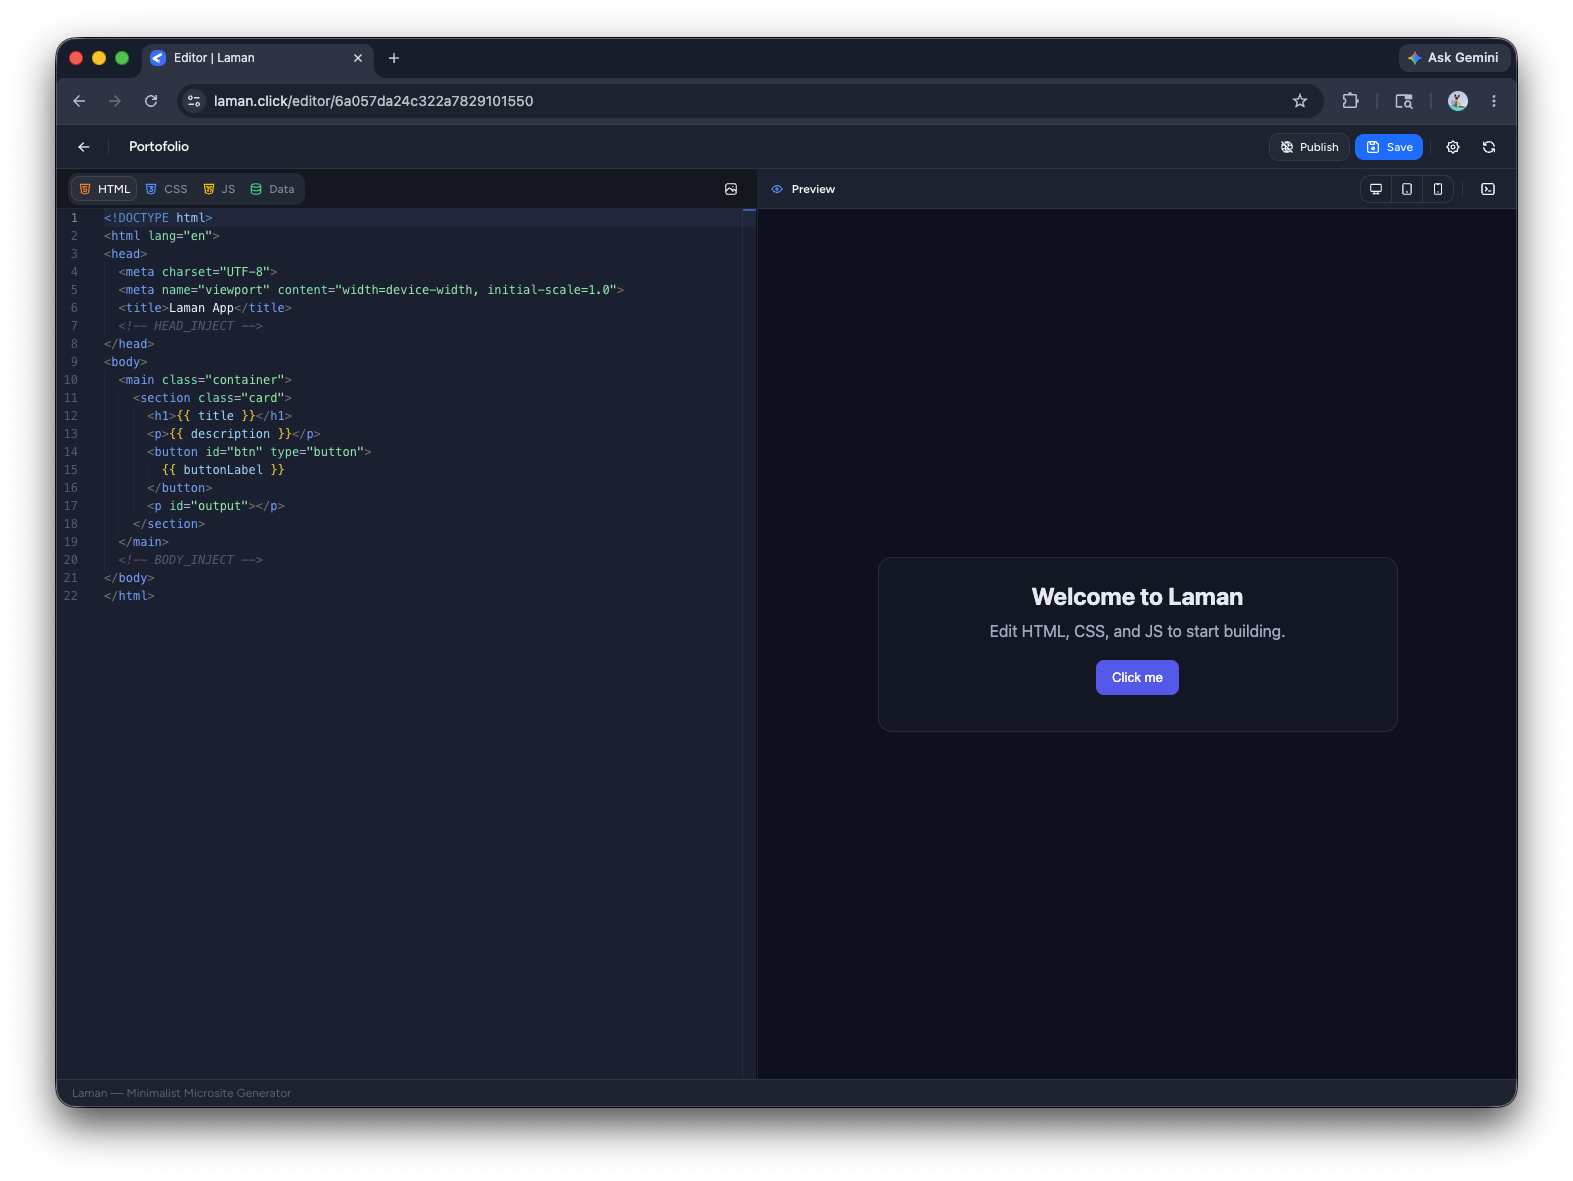
Don't start coding manually, use AI to generate the code. Move to the next step.
Step 4: Download and Add the Laman Skill
To make sure the AI output matches the Laman format, add the Laman skill in Claude first.
Download the Laman skill:
How to add the skill in Claude:
- Open Claude and go to the Skills menu.
- Click Add Skill and upload
laman-code-guidelines.zip. - Activate the skill before asking AI to generate code.
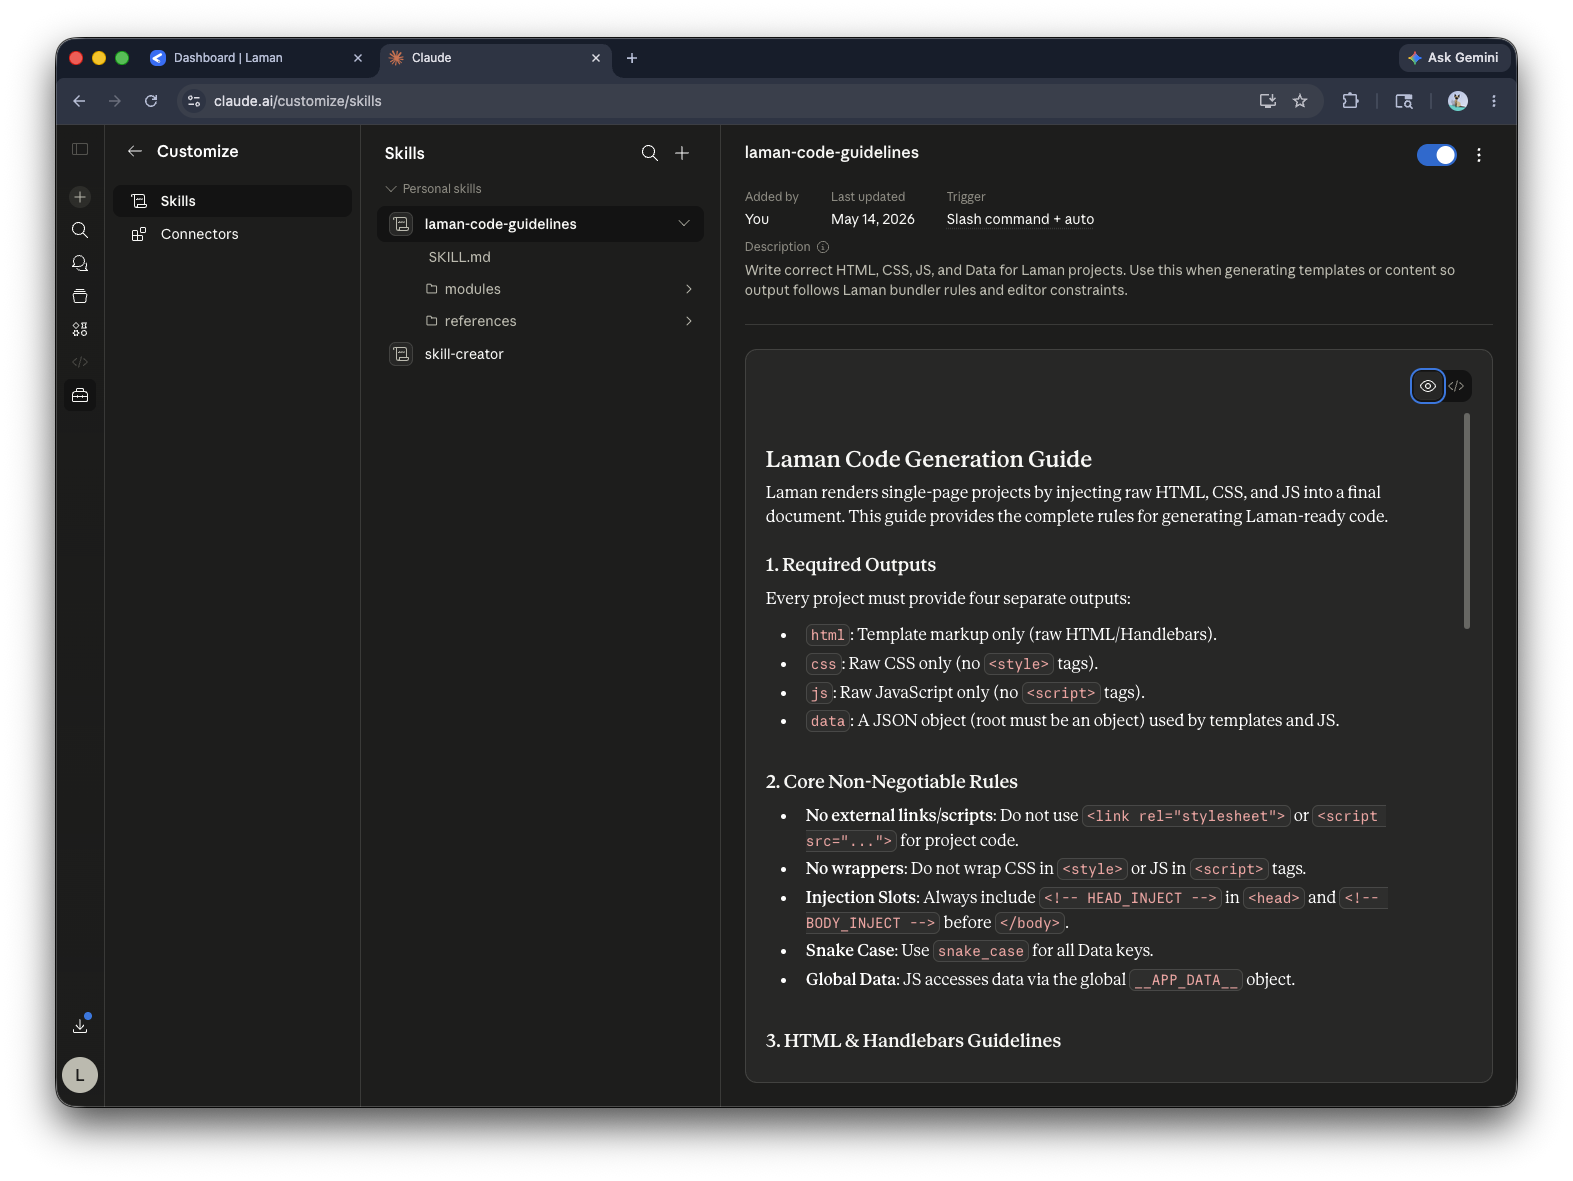
Once the skill is active, continue to the next step to generate the code.
Step 5: Generate Code with AI
Use this prompt or modify it to fit your needs, and don't forget to call the skill we added with /laman-code-guidelines.
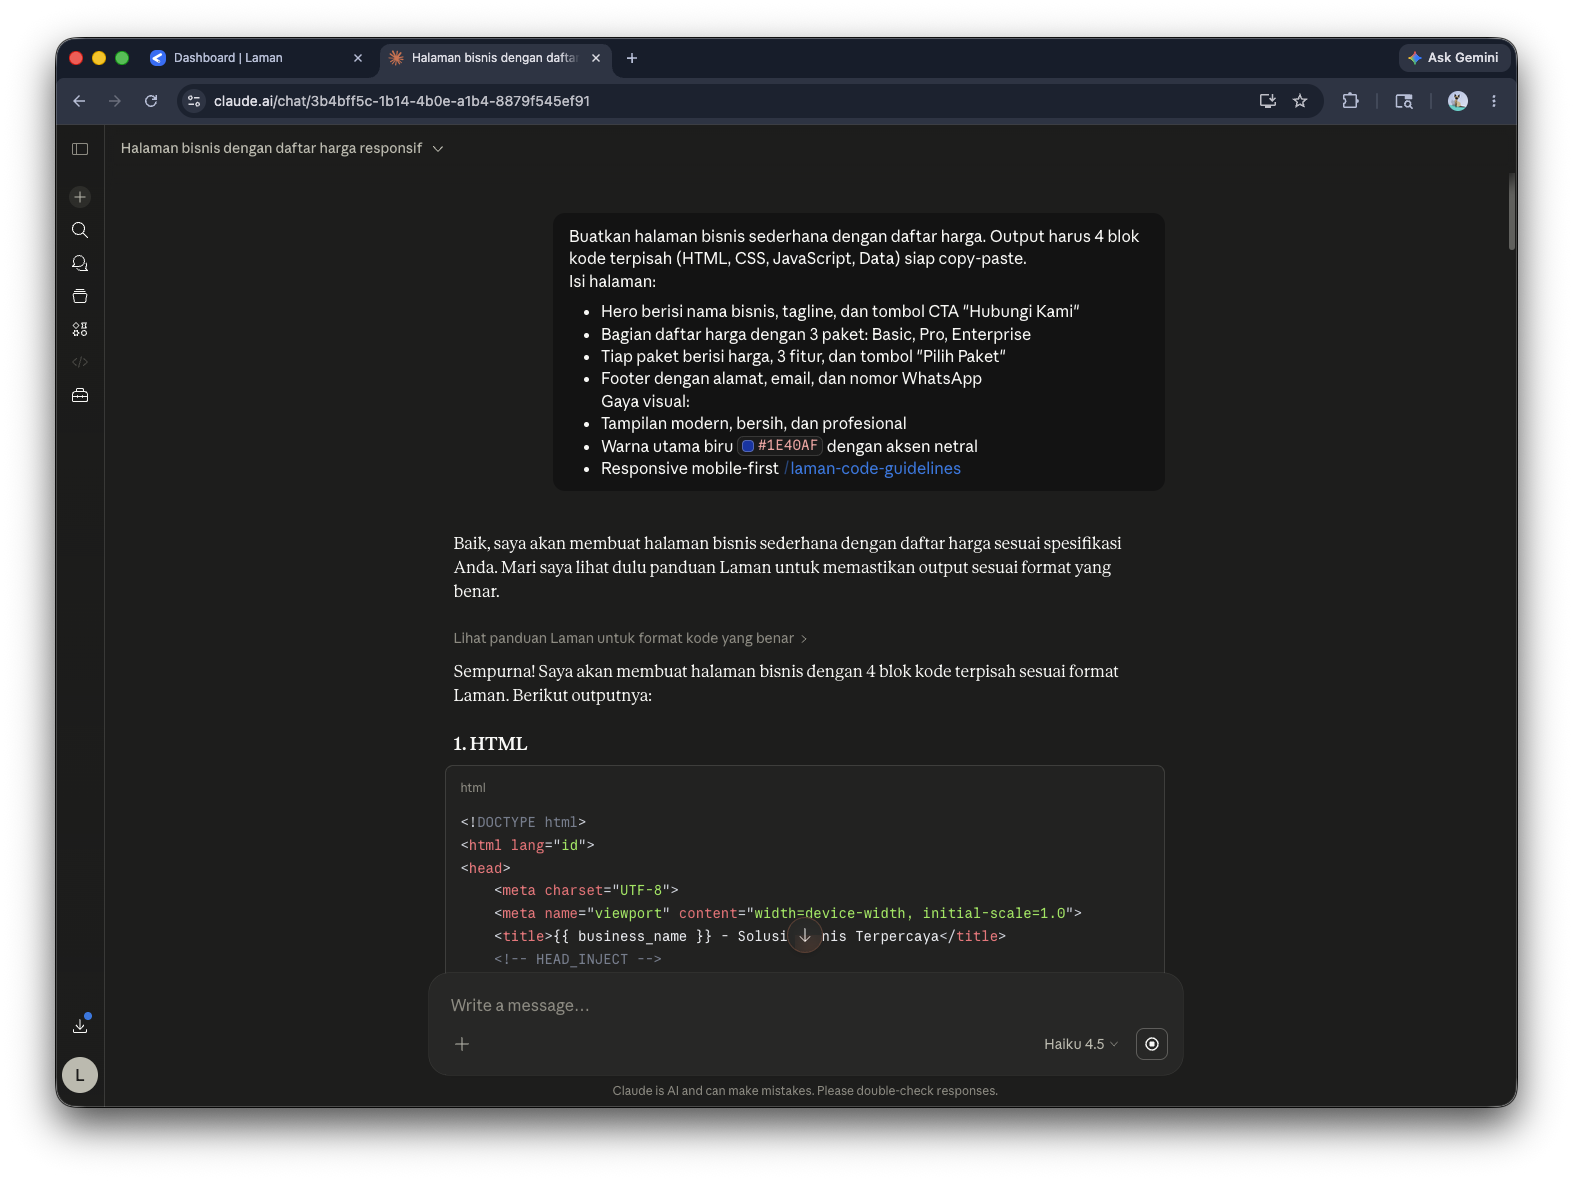
Prompt template:
Create a simple business page with a pricing list. Output must be 4 separate code blocks (HTML, CSS, JavaScript, Data) ready to copy-paste.
Page content:
- Hero with business name, tagline, and a "Contact Us" CTA button
- Pricing section with 3 packages: Basic, Pro, Enterprise
- Each package includes price, 3 features, and a "Choose Plan" button
- Footer with address, email, and WhatsApp number
Visual style:
- Modern, clean, and professional
- Primary color blue #1E40AF with neutral accents
- Mobile-first responsive
/laman-code-guidelines
Tips for better prompts:
- Be specific: "Brand color blue #1E40AF, Poppins font, 24px spacing" is much better than just "nice and professional"
- Add references: If possible, attach a screenshot of a page you like. AI will understand the proportions and layout you want
- Detail your content: Provide the text or list of details that should appear on the page, don't let AI make it up
Step 6: Paste Code into Editor
AI will generate 4 blocks of code. Paste each block into the corresponding panel in Laman:
- HTML code → paste into HTML panel
- CSS code → paste into CSS panel
- JavaScript code → paste into JS panel (if applicable)
- Data JSON → paste into Data panel (Raw)
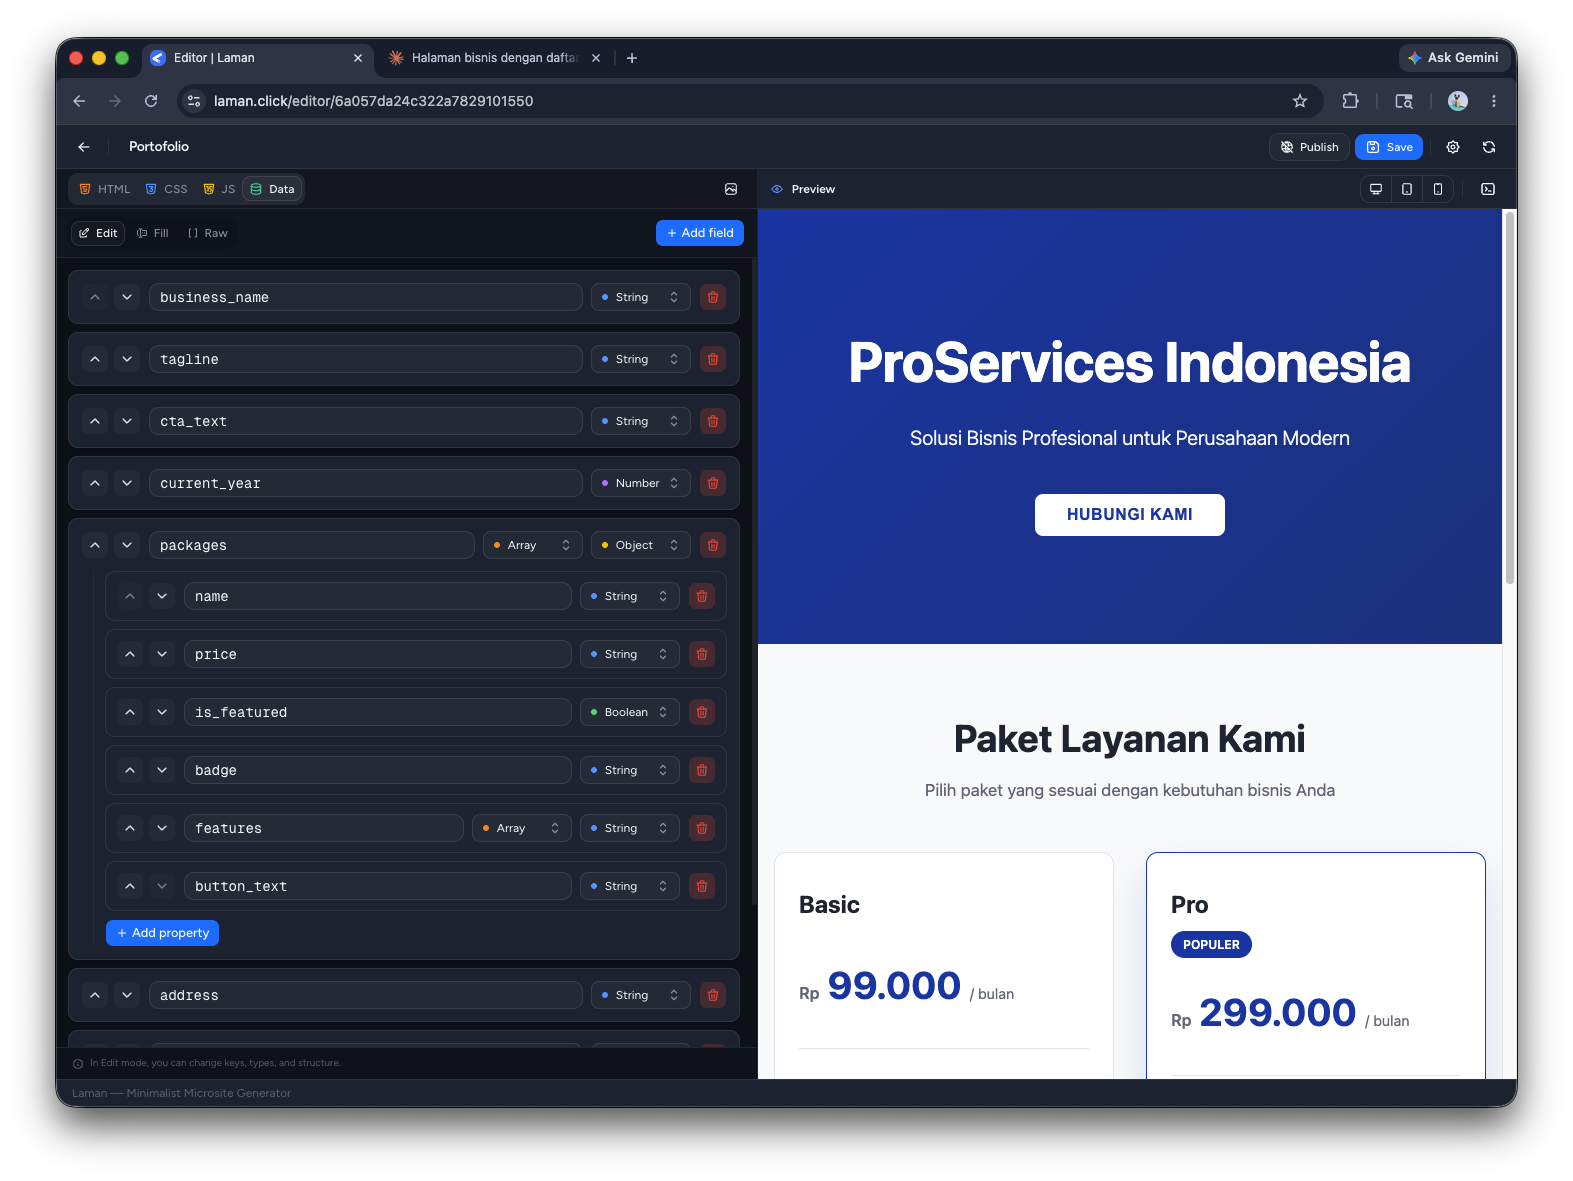
Laman will render a preview as you paste. If there are errors or it doesn't look right, you can edit directly in the editor or ask AI to revise the prompt.
Step 7: Preview Results
Check the preview on the right side or click the Preview button. Make sure:
- It's responsive by checking on mobile, tablet, and desktop
- Colors and fonts match your preferences
- All content displays properly
- Links and buttons work

If you need edits, you can change it directly in the editor or ask AI to create a revised version and paste it again.
Step 8: Iterate with AI (If Needed)
Not satisfied with the first result? Easy. Go back to AI and give feedback:
- "Gallery spacing is too wide, reduce it to 12px and round corners to 16px"
- "Hero color is too dark, change it to a softer tone"
- "Add smooth scroll and fade-in animation when the page loads"
AI will generate a new version. Paste it again into the editor.
This process can be repeated until you're completely satisfied.
Step 9: Publish Your Laman
When everything is perfect, click the Publish button. A dialog will appear to set up your project URL. Set a slug for your project, for example portfolio or creator-landing. Your link will be [username].laman.click/portfolio.
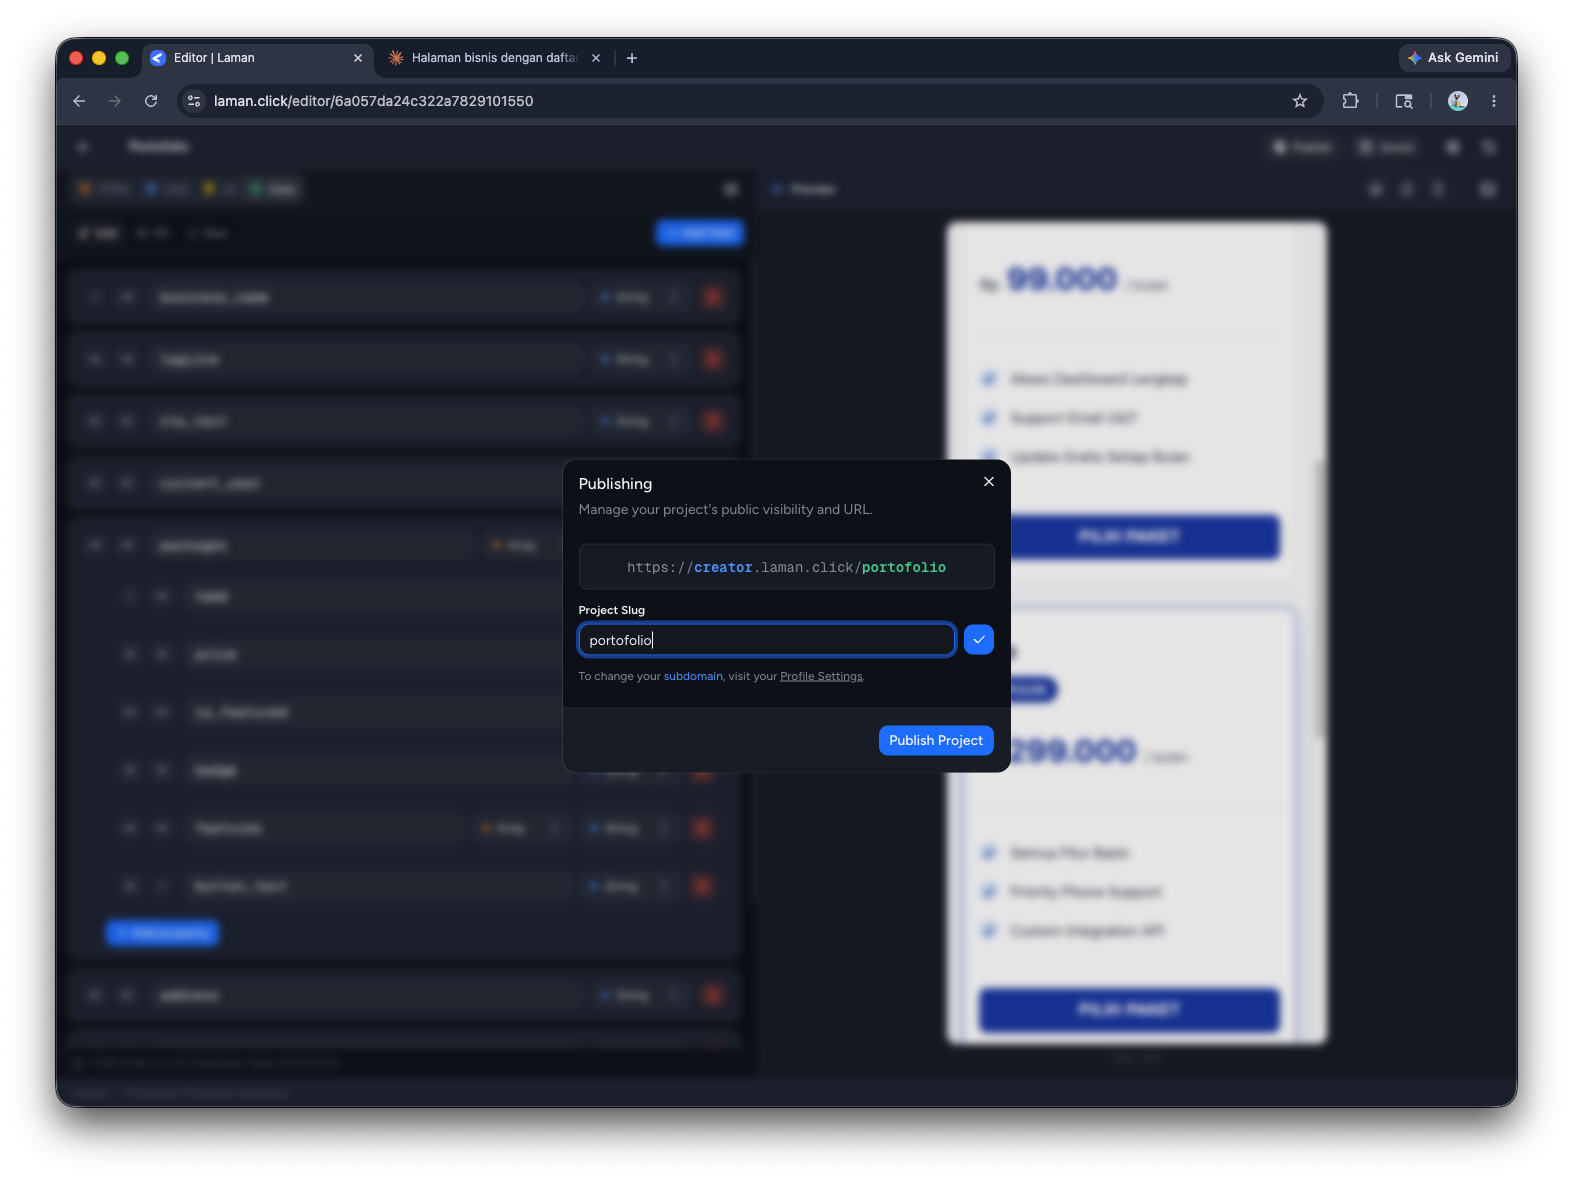
Once you've finished setting up your project URL, click the "Publish Project" button in the dialog. You've successfully created a Microsite! Access the URL to view it.
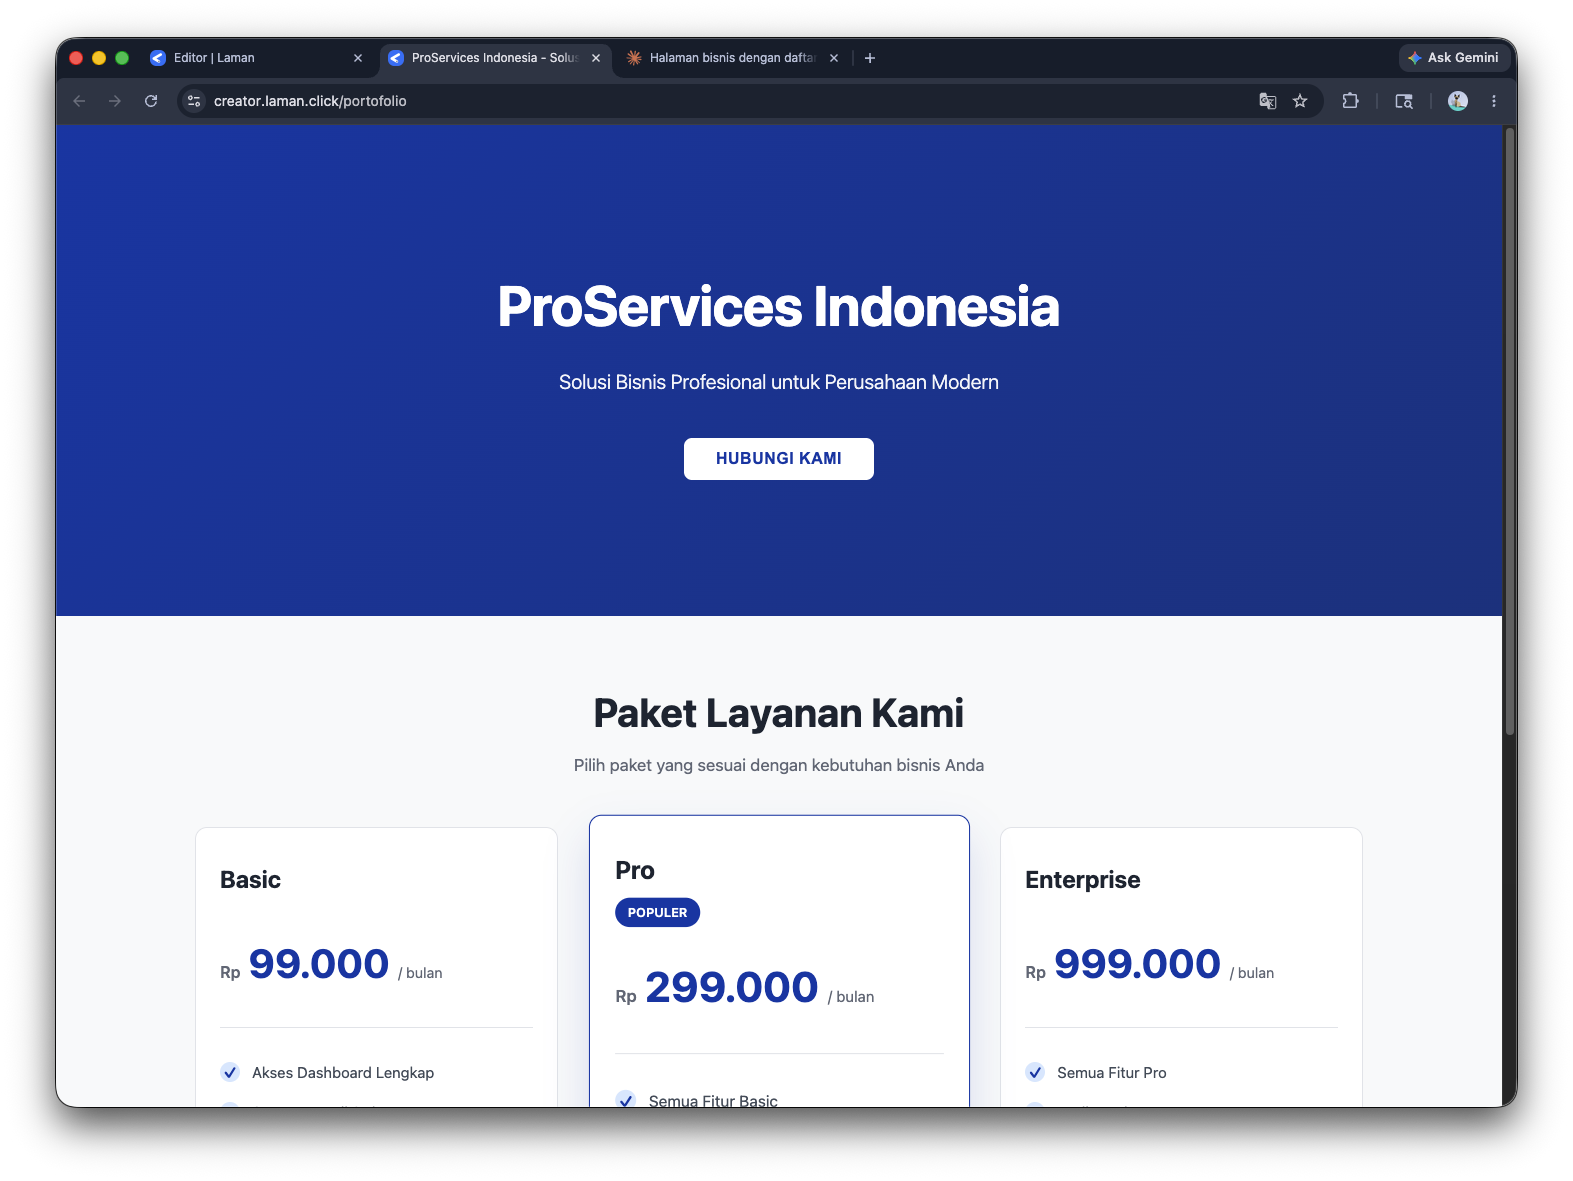
Your link: [username].laman.click/[slug]
For full automation without copy-paste, check out the article Automation with Claude and Laman Connector.